

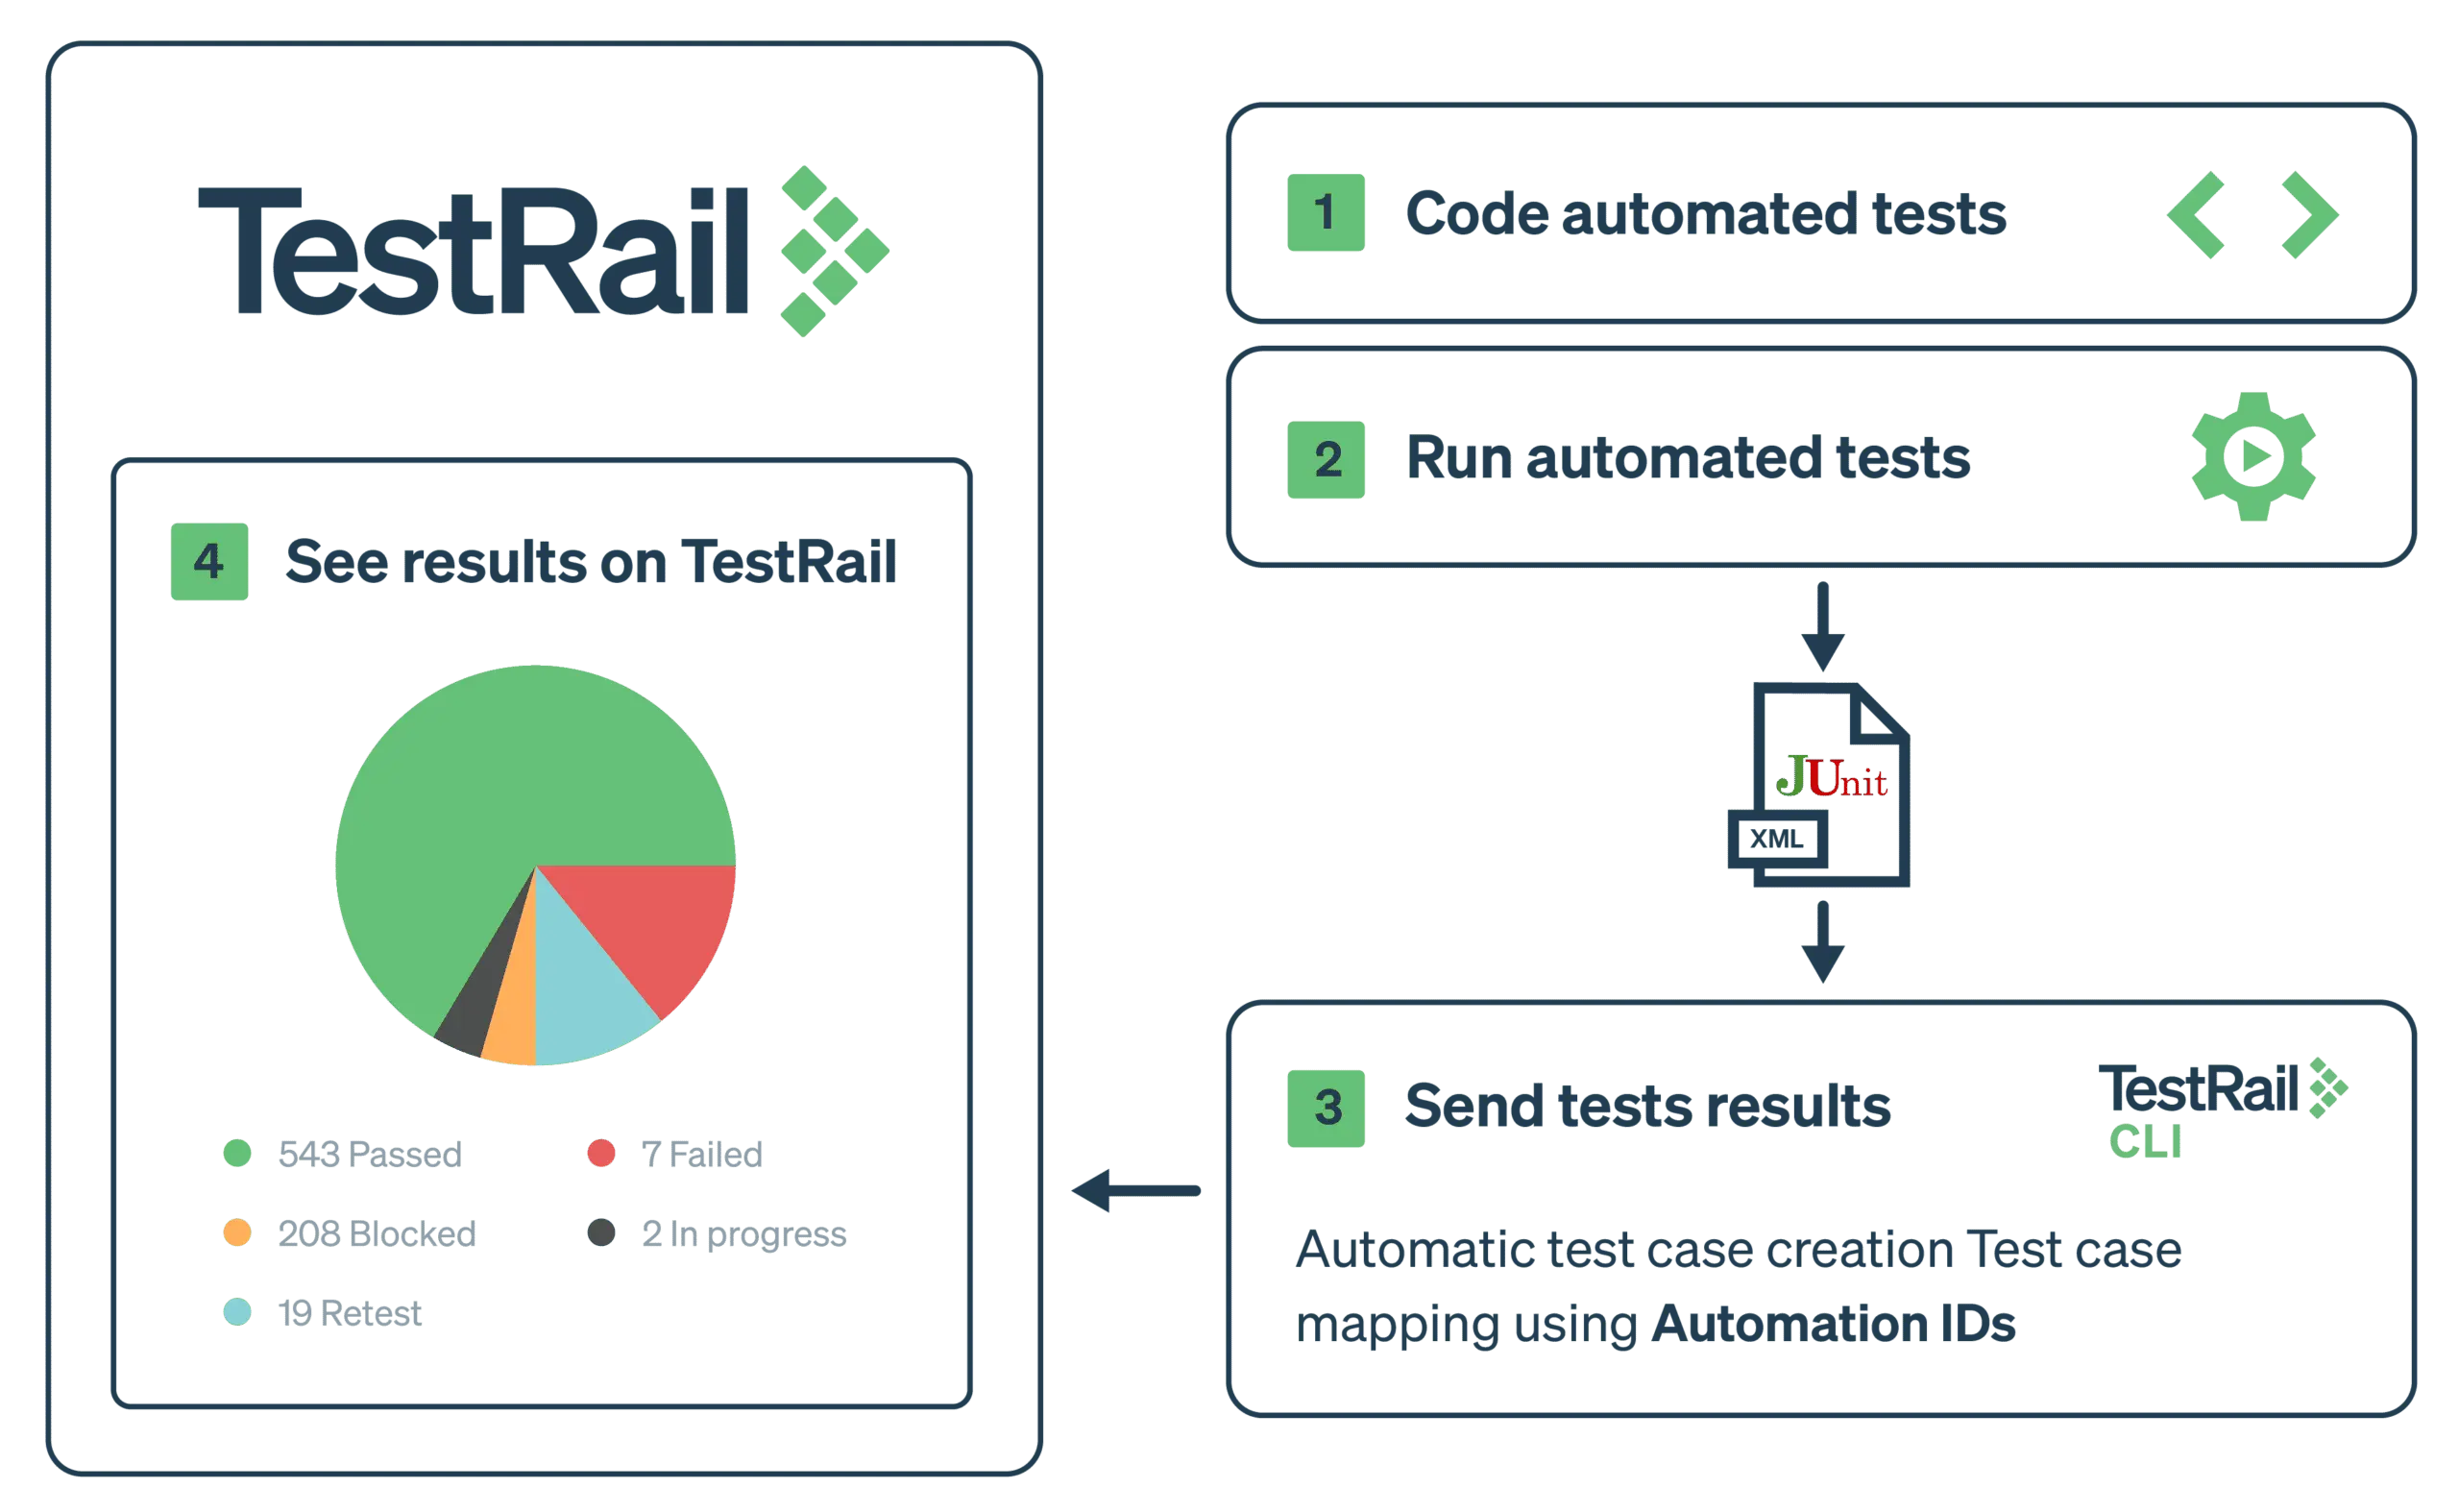
code-first workflow برای تیمهای فنی که طراحی تست را مستقیماً در codebase خود مدیریت میکنند، گزینهای ایدهآل است. با این روش میتوانید نتایج تستهای خودکار را با TestRail همگامسازی کنید بدون اینکه لازم باشد test caseها را بهصورت دستی در TestRail UI ایجاد یا مدیریت کنید.
این رویکرد مدیریت تست را سبک و یکپارچه با CI/CD pipeline نگه میدارد و در عین حال، visibility و قابلیتهای گزارشگیری TestRail را در اختیار تیم شما قرار میدهد.
چرا از Code-First Workflow استفاده کنیم؟ #
- از دوبارهکاری برای ایجاد test caseهای تکراری در TestRail جلوگیری میکند
- طراحی تست و منطق آن را در کد اتوماسیون شما نگه میدارد
- بر اساس اجرای تستها، test caseها را بهصورت خودکار ایجاد و همگامسازی میکند
- برای تیمهای مهندسی که ترجیح میدهند ابتدا تستها را در کد بنویسند و بعد در یک ابزار مدیریت کنند، ایدهآل است
| مزایا | معایب |
|---|---|
|
|
تفاوتهای Code-First و Specification-First #
| ویژگی | Code-First | Specification-First |
|---|---|---|
| طراحی case از کجا شروع میشود؟ | کد اتوماسیون | TestRail UI |
| test caseها کجا ایجاد میشوند؟ | بهصورت خودکار با CLI | از قبل، بهصورت دستی یا از طریق API ایجاد شده است |
| مناسب برای… | تیمهای فنی و کدمحور | تیمهایی که فرایند QA را در TestRail برنامهریزی میکنند |
| ریسک ایجاد مورد تکراری | بیشتر اگر mappingها مدیریت نشوند | کمتر |
| منبع mapping |
automation_id مثلا classname.name |
شناسههای test case در TestRail |
آپلود نتایج تست با استفاده از CLI #
پیشنیازها #
قبل از شروع آپلود نتایج تست:
- TestRail CLI را نصب کنید: طبق راهنمای نصب TestRail CLI پیش بروید.
-
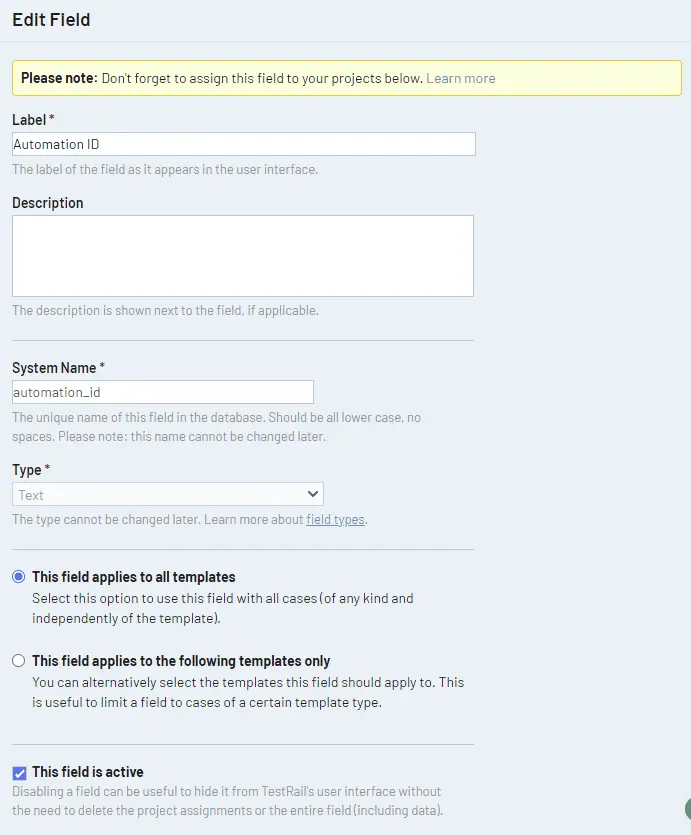
یک custom field به TestRail اضافه کنید:
- به مسیر Admin > Customizations > Add Field بروید
- یک field با این نام ایجاد کنید (System name)
automation_id - نوع field: String
- اعمال شود روی: Test Cases
- از این field برای mapping کردن تستهای مبتنی بر کد به test caseهای TestRail استفاده میشود.
آپلود نتایج تست #
۱. گزارش JUnit XML خود را آماده کنید #
در ادامه یک نمونه فایل نتیجه تست با قالب JUnit آمده است:
<testsuites name="test suites root">
  <testsuite failures="0" errors="0" skipped="1" tests="1" time="0.05" name="tests.LoginTests">
    <testcase classname="tests.LoginTests" name="test_case_1" time="159">
      <skipped message="Please skip">skipped by user</skipped>
    </testcase>
    <testcase classname="tests.LoginTests" name="test_case_2" time="650"/>
    <testcase classname="tests.LoginTests" name="test_case_3" time="159">
      <failure message="Fail due to...">failed due to…</failure>
    </testcase>
  </testsuite>
</testsuites>
#
۲. با CLI آپلود کنید #
این دستور نتایج تست را آپلود میکند و در صورت نیاز، test caseها را بهصورت خودکار ایجاد میکند:
# Uploads results.xml to TestRail using code-first mapping
trcli -y \
  -h https://<INSTANCE-NAME>.testrail.io \
  --project "TRCLI Test" \
  --username <YOUR_EMAIL> \
  --password <API_KEY_OR_PASSWORD> \
  parse_junit \
  --title "Automated Tests Run" \
  -f results.xml
پارامترها:
-
-y: پیامهای تأیید را رد میکند و برای استفاده در CI مناسب است -
--project: نام project شما در TestRail -
--title: نام test run -
-f: مسیر فایل نتایج JUnit XML
نحوه کارکرد نگاشت #
هر test case با استفاده از automation_id نگاشت میشود؛ این فیلد بهطور خودکار از کلاس test و نام آن، با قالب زیر ساخته میشود:
<classname>.<testname>برای مثال،
<testcase classname="tests.LoginTests" name="test_case_1"/>در automation_id:
tests.LoginTests.test_case_1
TestRail این مقدار را با test caseهای موجود و با استفاده از automation_id مقایسه میکند. اگر موردی پیدا نکند، یک test case جدید برای شما میسازد.
automation_id آنها را تکمیل کنید.
automation_id را بررسی کنید تا مطمئن شوید نگاشتها دقیق باقی میمانند.
⚠️ هشدار: تغییر نام testها یا ساختار آنها میتواند باعث ایجاد test caseهای تکراری شود.
تغییر نام یک test یا جابهجا کردن محل آن در کد، یک automation_id جدید ایجاد میکند که ممکن است باعث ایجاد موارد تکراری شود.
#
آشنایی با نگاشت test case از طریق automation_id
#
یکی از قابلیتهای اصلی گردش کار کد-اول، نگاشت خودکار test caseها با استفاده از automation_id در TestRail است. با این روش، کد automation شما و test caseهای TestRail همگام میمانند، بدون اینکه لازم باشد TestRail case IDها را بهصورت دستی به کد test خود اضافه کنید.
هر بار که نتایج را با CLI آپلود میکنید، CLI تلاش میکند test caseها را بر اساس این automation_id مطابقت دهد. اگر مورد مطابقی پیدا نکند، بهطور خودکار یک test case جدید ایجاد میکند.
نمونه JUnit XML زیر را در نظر بگیرید. CLI مقدارهای classname و name را ترکیب میکند تا برای هر test یک automation ID یکتا بسازد:
<testcase classname="tests.LoginTests" name="test_login_with_invalid_password" time="159"/>
<testcase classname="tests.LoginTests" name="test_login_with_valid_credentials" time="221"/>
نتیجه، مقدارهای automation_id زیر است:
tests.LoginTests.test_login_with_invalid_password
tests.LoginTests.test_login_with_valid_credentials
وقتی CLI را اجرا میکنید، این رشتهها را با automation_id در test caseهای TestRail شما مقایسه میکند:
$ trcli -y \
  -h https://INSTANCE-NAME.testrail.io \
  --project "Login Tests" \
  --username user@domain.com \
  --password passwordORapikey \
  parse_junit \
  --title "Login Feature Tests" \
  -f login_tests_results.xml
خروجی CLI:
Parsing JUnit report.
Processed 2 test cases in 1 section.
Found 1 matching TestRail case.
Adding 1 new test case to the suite.
Creating test run. Run created: https://INSTANCE-NAME.testrail.io/index.php?/runs/view/456
Adding results: 2/2, Done.
در این مثال:
- یک test case قبلاً از طریق
automation_id - نگاشت شده بود و یک test case دیگر وجود نداشت و بهطور خودکار ایجاد شد
- هر دو نتیجه در یک run واحد آپلود شدند
مثال چرخه عمر نگاشت #
فرض کنید بعداً یک test را refactor میکنید:
- <testcase classname="tests.LoginTests" name="test_login_with_valid_credentials"/>
+ <testcase classname="tests.AuthTests" name="test_login_successful"/>
automation ID جدید این خواهد بود:
tests.AuthTests.test_login_successfulاگر این نتیجه را بدون بهروزرسانی automation_id در TestRail آپلود کنید، CLI یک test case جدید ایجاد میکند ، نه اینکه test case موجود را بهروزرسانی کند.
automation_id را در test caseهای موجود در TestRail وارد کنید اگر میخواهید آنها match شوند<package>.<module>.<test_name>)
نگاشت بر اساس گزارش واقعی JUnit #
بیایید این نمونه واقعی از JUnit XML و نحوه تفسیر آن توسط TestRail CLI را دقیقتر بررسی کنیم:
<testsuites name="test suites root">
  <testsuite failures="0" errors="0" skipped="1" tests="1" time="0.05" name="tests.LoginTests">
    <testcase classname="tests.LoginTests" name="test_case_1" time="159">
      <skipped type="pytest.skip" message="Please skip">
        skipped by user
      </skipped>
    </testcase>
    <testcase classname="tests.LoginTests" name="test_case_2" time="650"/>
    <testcase classname="tests.LoginTests" name="test_case_3" time="159">
      <failure type="pytest.failure" message="Fail due to...">
        failed due to…
      </failure>
    </testcase>
  </testsuite>
</testsuites>
CLI این automation IDها را تولید میکند:
| خط test case |
automation_id تولیدشده |
|---|---|
| <testcase classname=”tests.LoginTests” name=”test_case_1″/> | tests.LoginTests.test_case_1 |
| <testcase classname=”tests.LoginTests” name=”test_case_2″/> | tests.LoginTests.test_case_2 |
| <testcase classname=”tests.LoginTests” name=”test_case_3″/> | tests.LoginTests.test_case_3 |
سپس میتوانید این دستور را اجرا کنید تا نتایج به TestRail ارسال شوند:
trcli -y \
  -h https://INSTANCE-NAME.testrail.io \
  --project "TRCLI Test" \
  --username user@domain.com \
  --password passwordORapikey \
  parse_junit \
  --title "Automated Tests Run" \
  -f results.xml
خلاصه نتایج CLI
Parsing JUnit report.
Processed 3 test cases in 1 sections.
Found 3 test cases not matching any TestRail case.
Adding missing sections to the suite.
Adding missing test cases to the suite.
Adding test cases: 3/3, Done.
Creating test run. Run created: https://INSTANCE-NAME.testrail.io/index.php?/runs/view/123
Adding results: 3/3, Done.
Submitted 3 test results in 8.9 secs.
پس از اجرا:
- test caseهای جدید در project شما در TestRail ایجاد میشوند
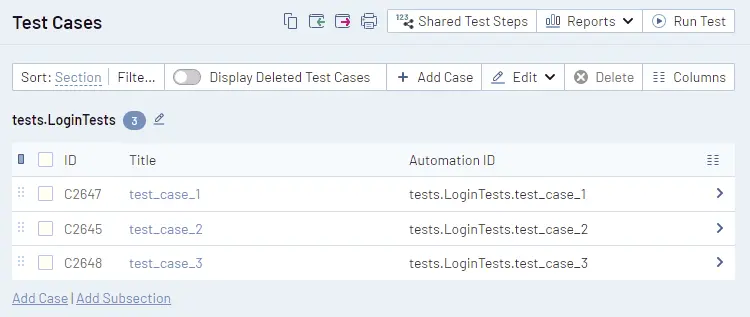
- هرکدام یک
automation_idمنحصربهفرد مطابق با این الگو خواهند داشت - نتایج، از جمله وضعیتهای skipped و failed، در TestRail نمایش داده میشوند
اکنون میتوانید آنها را در بخش Test Runs & Results یا test caseها ، با امکان ردیابی تا automation suite شما.
نکات پایانی #
- این workflow برای تیمهایی مناسب است که فرآیند QA خود را از طریق کد مدیریت میکنند و به یکپارچهسازی سبک با TestRail نیاز دارند.
- برای گرفتن بهترین نتیجه،
automation_idمقادیر را یکسان و بهروز نگه دارید.- اگر میخواهید نتایج automation را برای test caseهایی که از قبل در TestRail وجود دارند upload کنید ، قبل از upload کردن نتایج automation، حتماً automation_id آن test caseها را بهروز کنید.
- اگر بعداً نام test یا محل آن را در automation suite خود تغییر دهید ، TestRail یک test case جدید ایجاد میکند؛ مگر اینکه فیلد automation_id آن test case را در TestRail هم بهروز کنید.
- میتوانید runهای uploadشده را در این مسیر بررسی کنید: TestRail > Test Runs & Results > Automated Tests Run.
🎓 مهارتهای testing خود را با TestRail Academyارتقا دهید!
دورههای رایگان و self-paced را ببینید تا بیشترین استفاده را از TestRail ببرید.
👉 یادگیری را همین حالا شروع کنید

از کجا کمک بگیریم #


