
test caseها را میتوان با ابزارهای مختلف طراحی کرد و حتی بهصورت خودکار ساخت. اگر ابزاری دارید که test case تولید میکند، احتمالاً میخواهید آن test caseها بهطور خودکار در TestRail ایجاد شوند تا تسترها بتوانند از آنها استفاده کنند و نتیجهها را ثبت کنند.
با امکان ایجاد test case بهصورت programmatic، میتوانید برای use caseهایی مثل موارد زیر ابزار و integration بسازید:
- ایجاد test case بر اساس تستهای خودکار
- ابزارهای تولید test case ترکیبی
- سایر ابزارهای تولید test case مبتنی بر مدل
| نمونههای واقعی | Use case |
|---|---|
| TestRail CLI – JUnit Parser | هنگام آپلود نتایج test automation، تستها را بهطور خودکار ایجاد میکند |
| TestRail CLI – OpenAPI Parser | از روی مشخصات OpenAPI، test case تولید میکند |
نکاتی درباره custom fieldها #
برای کاملتر کردن test caseها، TestRail به شما امکان میدهد fieldها و templateهای test case را سفارشی کنید. اگر custom result fieldها را پیکربندی کرده باشید، میتوانید مقدارها را با استفاده از این الگو هم ارسال کنید custom_field_name ، برای مثال custom_automation_status در مثال بالا.
همچنین میتوانید با اجرای یکی از requestهای زیر، جزئیات همه case fieldها را ببینید:
| Case fieldها | GET index.php?/api/v2/get_case_fields |
| Case templateها | GET index.php?/api/v2/get_templates/{project_id} |
| اولویتهای case | GET index.php?/api/v2/get_priorities |
| نوعهای case | GET index.php?/api/v2/get_case_types |
| وضعیتهای case | GET index.php?/api/v2/get_case_statuses |
ایجاد test case با template «Test Case (Text)» #
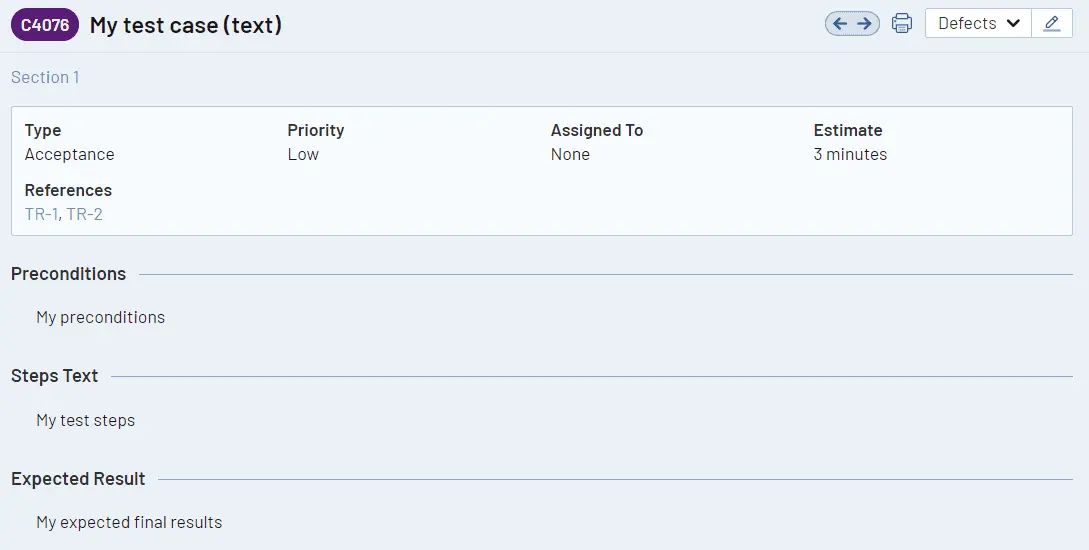
template متنی، template پیشفرض TestRail است و سادهترین، اما در عین حال انعطافپذیرترین template محسوب میشود. این template شامل یک پیششرطها field، یک مراحل field، و یک نتیجه مورد انتظار field است. میتوانید با استفاده از این field و با bodyای مشابه نمونه زیر، تست ایجاد کنید.
POST index.php?/api/v2/add_case/{section_id}
curl -X POST \
  -u "user@example.com:password" \
  -d "@path/to/data.json" \
  "https://example.testrail.io/index.php?/api/v2/add_case/432"
{
"title": "My test case (text)",
"template_id": 1,
"type_id": 1,
"priority_id": 1,
"estimate": "3m",
"refs": "TR-1, TR-2",
"custom_preconds": "My preconditions",
"custom_steps": "My test steps",
"custom_expected": "My expected final results"
}{
"id": 4076,
"title": "My test case (text)",
"section_id": 498,
"template_id": 1,
"type_id": 1,
"priority_id": 1,
"milestone_id": null,
"refs": "TR-1, TR-2",
"created_by": 18,
"created_on": 1684927460,
"updated_by": 18,
"updated_on": 1684927460,
"estimate": "3m",
"estimate_forecast": null,
"suite_id": 53,
"display_order": 1,
"is_deleted": 0,
"case_assignedto_id": null,
"custom_automation_type": null,
"custom_preconds": "My preconditions",
"custom_steps": "My test steps",
"custom_testrail_bdd_scenario": null,
"custom_expected": "My expected final results",
"custom_steps_separated": null,
"custom_mission": null,
"custom_goals": null,
"comments": []
}
ایجاد test case با template «Test Case (Steps)» #
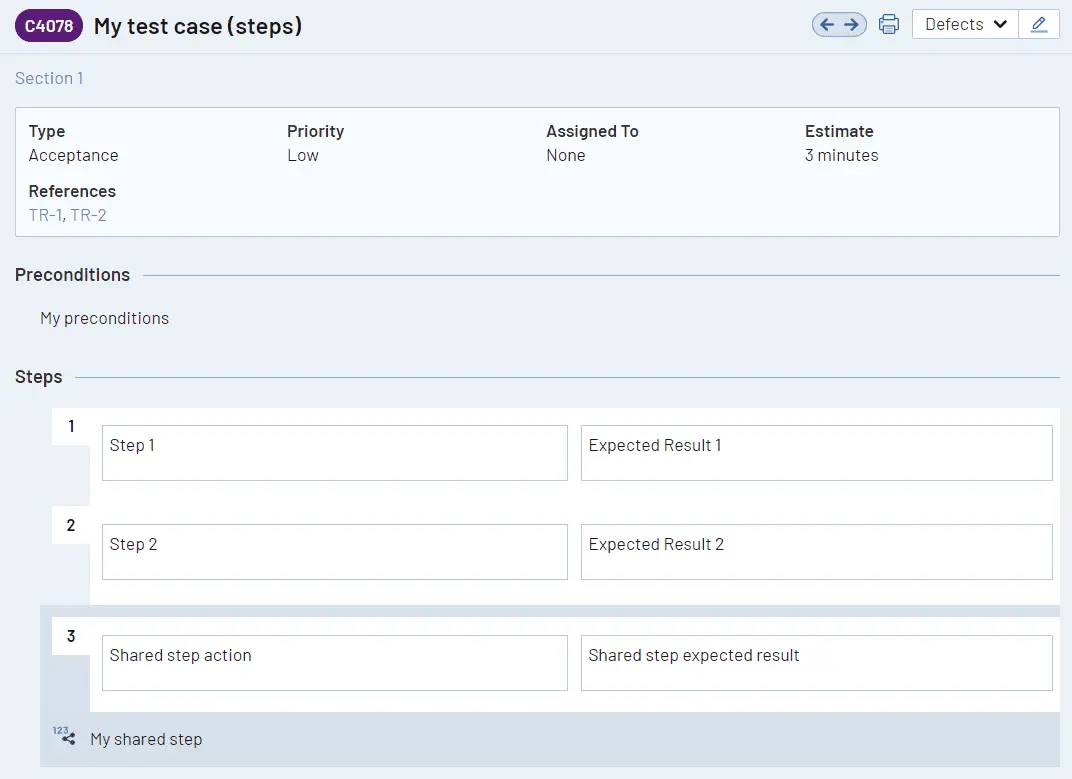
اگر میخواهید کنترل دقیقتری روی نتایج test caseهای خود داشته باشید، بهتر است آنها را با test stepهای جداگانه طراحی کنید تا هنگام اجرا دقیقاً مشخص شود کدام step شکست خورده است. میتوانید با قالبی مشابه body زیر، یک test case با test stepهای جداگانه ایجاد کنید.
POST index.php?/api/v2/add_case/{section_id}
curl -X POST \
  -u "user@example.com:password" \
  -d "@path/to/data.json" \
  "https://example.testrail.io/index.php?/api/v2/add_case/432"
{
"title": "My test case (steps)",
"template_id": 2,
"type_id": 1,
"priority_id": 1,
"estimate": "3m",
"refs": "TR-1, TR-2",
"custom_preconds": "My preconditions",
"custom_steps_separated": [
{
"content": "Step 1",
"expected": "Expected Result 1"
},
{
"content": "Step 2",
"expected": "Expected Result 2"
},
{
"shared_step_id": 3
},
]
}{
"id": 4078,
"title": "My test case (steps)",
"section_id": 498,
"template_id": 2,
"type_id": 1,
"priority_id": 1,
"milestone_id": null,
"refs": "TR-1, TR-2",
"created_by": 18,
"created_on": 1684931159,
"updated_by": 18,
"updated_on": 1684931159,
"estimate": "3m",
"estimate_forecast": null,
"suite_id": 53,
"display_order": 2,
"is_deleted": 0,
"case_assignedto_id": null,
"custom_automation_type": null,
"custom_preconds": "My preconditions",
"custom_steps": null,
"custom_testrail_bdd_scenario": null,
"custom_expected": null,
"custom_steps_separated": [
{
"content": "Step 1",
"expected": "Expected Result 1",
"additional_info": "",
"refs": ""
},
{
"content": "Step 2",
"expected": "Expected Result 2",
"additional_info": "",
"refs": ""
},
{
"shared_step_id": 3,
"content": "Shared step action",
"expected": "Shared step expected result"
}
],
"custom_mission": null,
"custom_goals": null,
"comments": []
}
ایجاد test case با template «Exploratory Session» #
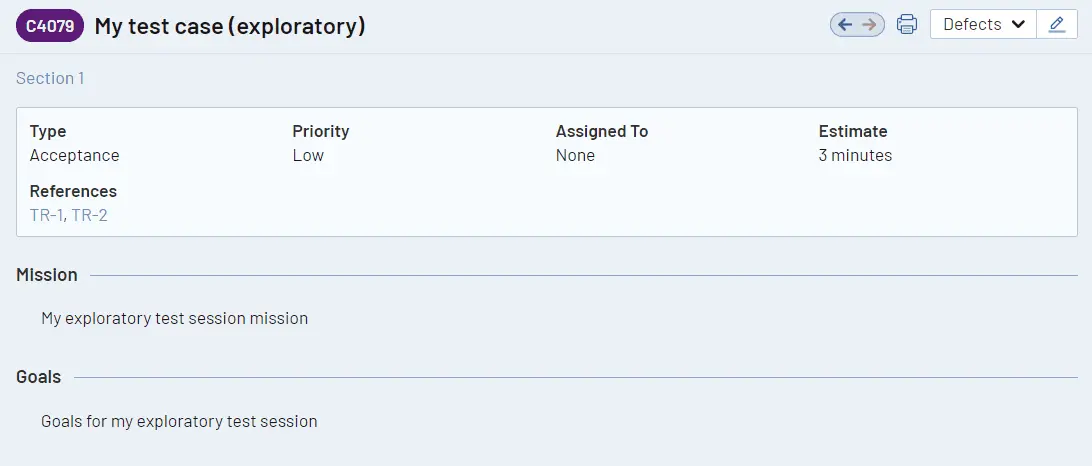
اگر میخواهید با سیستم بهشکلی آزادتر و کممحدودیتتر کار کنید و مطمئن شوید وضعیت آن مناسب است، exploratory testing روش بسیار مفیدی است و همزمان به شناخت بهتر سیستم هم کمک میکند. اگر این نوع تست را انجام میدهید و میخواهید charterهای exploratory test خود را برای مراجعههای بعدی در TestRail ذخیره کنید، میتوانید از bodyای مشابه نمونه زیر استفاده کنید.
POST index.php?/api/v2/add_case/{section_id}
curl -X POST \
  -u "user@example.com:password" \
  -d "@path/to/data.json" \
  "https://example.testrail.io/index.php?/api/v2/add_case/432"
{
"title": "My test case (exploratory)",
"template_id": 3,
"type_id": 1,
"priority_id": 1,
"estimate": "3m",
"refs": "TR-1, TR-2",
"custom_preconds": "My preconditions",
"custom_mission": "My exploratory test session mission",
"custom_goals": "Goals for my exploratory test session"
}{
"id": 4079,
"title": "My test case (exploratory)",
"section_id": 498,
"template_id": 3,
"type_id": 1,
"priority_id": 1,
"milestone_id": null,
"refs": "TR-1, TR-2",
"created_by": 18,
"created_on": 1684931263,
"updated_by": 18,
"updated_on": 1684931263,
"estimate": "3m",
"estimate_forecast": null,
"suite_id": 53,
"display_order": 3,
"is_deleted": 0,
"case_assignedto_id": null,
"custom_automation_type": null,
"custom_preconds": null,
"custom_steps": null,
"custom_testrail_bdd_scenario": null,
"custom_expected": null,
"custom_steps_separated": null,
"custom_mission": "My exploratory test session mission",
"custom_goals": "Goals for my exploratory test session",
"comments": []
}
Import کردن پیوستها #
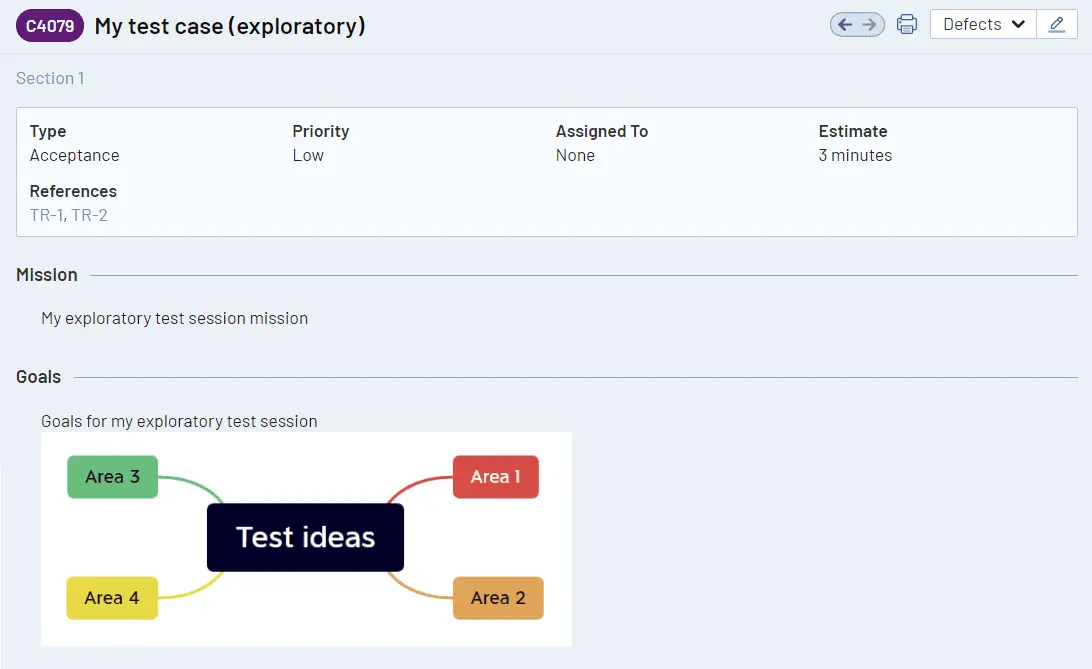
پیوستها میتوانند طراحی test case شما را کاملتر کنند؛ مثلا با استفاده از اسکرینشات بخشهای مختلف برنامه، مراحل را تصویریتر کنید، یا با آپلود نمودارهای تست و mindmapها مطمئن شوید هنگام اجرا چیزی از قلم نمیافتد. میتوانید با استفاده از request زیر، فایلها را به test caseهای خود پیوست کنید.
#
توجه داشته باشید که حداکثر حجم مجاز برای آپلود 256MB است.
POST index.php?/api/v2/add_attachment_to_case/{case_id}Content-Type: multipart/form-data
curl -X POST \
  -u "user@example.com:password" \
  -H "Content-Type: multipart/form-data" \
  -F "attachment=@path/to/image.jpg" \
  "https://example.testrail.io/index.php?/api/v2/add_attachment_to_case/42"
{ "attachment_id": "758c9b26-6038-4147-9a4d-74cd7af1499a" }اگر میخواهید پیوست را به یکی از فیلدهای متنی test case اضافه کنید، باید متن را بهروزرسانی کنید و مطابق مثال زیر یک لینک اضافه کنید.
POST index.php?/api/v2/update_case/{case_id}
curl -X POST \
  -u "user@example.com:password" \
  -d "@path/to/data.json" \
  "https://example.testrail.io/index.php?/api/v2/update_case/4079"
{
"custom_goals": "Goals for my exploratory test session\r\n "
}{
"id": 4079,
"title": "My test case (exploratory)",
"section_id": 498,
"template_id": 3,
"type_id": 1,
"priority_id": 1,
"milestone_id": null,
"refs": "TR-1, TR-2",
"created_by": 18,
"created_on": 1684931263,
"updated_by": 18,
"updated_on": 1684931263,
"estimate": "3m",
"estimate_forecast": null,
"suite_id": 53,
"display_order": 3,
"is_deleted": 0,
"case_assignedto_id": null,
"custom_automation_type": null,
"custom_preconds": null,
"custom_steps": null,
"custom_testrail_bdd_scenario": null,
"custom_expected": null,
"custom_steps_separated": null,
"custom_mission": "My exploratory test session mission",
"custom_goals": "Goals for my exploratory test session \r\n ",
"comments": []
}